


Table of Contents
ToggleA Bosch dishwasher that’s underperforming is frustrating, especially when you’re counting on it to handle the post-dinner mess. The good news? Most cleaning issues stem from simple, fixable problems, not a broken machine. Before you call a repair tech or start shopping for a replacement, there are six straightforward checks you can run yourself. This guide walks you through each one, using common tools and your own two hands. Most of these fixes take less than 30 minutes and cost almost nothing. Let’s get your dishwasher back to work.
Key Takeaways
- A Bosch dishwasher not cleaning properly is usually due to fixable issues like clogged spray arms, mineral buildup in filters, or incorrect detergent levels rather than equipment failure.
- Check and clear the spray arm holes and wash filter regularly using a toothpick and white vinegar soak to remove mineral deposits that block water flow.
- Proper loading is essential: place plates upright facing the spray arm, tilt glasses downward, and leave space for water to reach all surfaces and the spray arms to rotate freely.
- Use the correct detergent type and amount for your Bosch model, place pods in the main detergent cup, and keep rinse aid filled to prevent spots and filming.
- Select the appropriate wash cycle for your soil level—use normal or intensive cycles for heavily soiled dishes rather than quick or eco modes, and ensure your water heater reaches at least 120°F.
- If cleaning issues persist after these checks, contact a technician to diagnose deeper problems like failed heating elements, worn pump motors, or faulty control boards that require professional repair.
Check the Spray Arm and Wash Filter
The spray arm is your dishwasher’s workhorse, it spins and distributes water under pressure to clean your dishes. If it’s clogged, bent, or out of place, nothing gets clean. Start by removing the lower rack and inspecting the spray arm for food particles, mineral buildup, or debris stuck in the spray holes.
Use a toothpick or straightened paper clip to clear any blocked holes gently. Don’t force it: the holes are small and delicate. While you’re down there, check that the spray arm spins freely when you rotate it by hand. It should move without grinding sounds or stiffness.
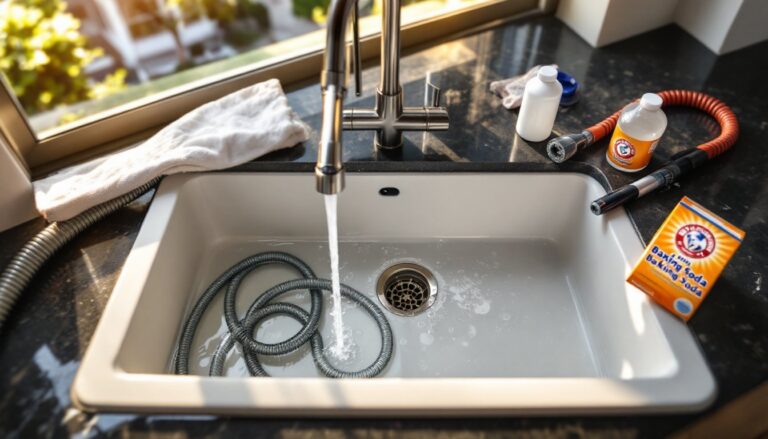
Next, check the wash filter, the basket-like screen at the bottom of the tub. This catches food particles so they don’t recirculate. Remove it by twisting it counterclockwise, then hold it under running water and scrub any stuck-on food with a soft brush or sponge. If mineral deposits or hard water buildup is caked on, soak it for 15 minutes in equal parts white vinegar and warm water, then scrub again and rinse thoroughly. Reinstall the filter, making sure it clicks back into place.
After reassembling, run a test cycle with dishes you don’t mind risking. If cleaning improves, you’ve solved it. If not, move to the next fix.
Load Your Dishwasher Correctly
Here’s a truth most dishwasher manuals bury: how you load the machine matters as much as its condition. Poor loading blocks water spray and prevents dishes from getting clean. Bosch and other manufacturers engineer specific patterns into their racks for a reason, follow them.
Bottom rack guidelines: Place plates upright or angled (facing the spray arm), not flat stacked. Bowls can nest on the sides, but leave the center open for the spray arm to do its job. Never load the bottom rack so full that it prevents the upper spray arm from rotating freely.
Upper rack rules: Load glasses, mugs, and small dishes in the upper basket, tilted slightly downward so water drains off instead of pooling inside. Avoid loading fragile items directly over the spray arm: water pressure can crack thin glass. Don’t block the upper spray arm path, it needs to spin 360 degrees without hitting anything.
Cutlery basket: Load forks and spoons with handles down, knives handle up (for safety). Mix blade and handle directions to prevent nesting, which blocks water jets.
General rule: space dishes so water can reach all surfaces. Crowding the machine guarantees spots and residue. Proper loading techniques are covered in most dishwasher guides, check your manual or Bosch’s website for a diagram specific to your model.
Verify the Detergent and Rinse Aid Levels
A dishwasher can’t clean without the right cleaning chemistry, and using the wrong detergent dose is one of the most overlooked culprits. Bosch dishwashers typically use pods, liquid, or powder detergent. Check your model’s manual for the recommended type and amount.
If you’re using pods: Use only one per cycle, and place it in the main detergent cup (the larger compartment), not the pre-rinse cup. Placing it loose in the bottom of the tub delays its release and wastes product.
If you’re using powder or liquid: Fill the main cup to the line indicated on the inside of the cup door. Don’t overfill: more detergent doesn’t mean cleaner dishes, and excess suds can damage the machine over time.
Rinse aid is equally critical. This chemical helps water sheet off dishes and prevents spots and filming. Open the rinse aid dispenser (usually a small cap on the bottom right inside the tub) and check the level. If it’s empty or low, refill it. The dispenser has a fill line marked on it. Use rinse aid designed for dishwashers: hand-washing additives won’t work.
Hard water areas especially benefit from rinse aid. If your tap water is mineral-heavy (check with your local water utility if unsure), your rinse aid should be at maximum. Some Bosch models have adjustable rinse aid settings, consult your manual to dial in the right strength for your water hardness. This simple adjustment solves cloudiness and spotting in minutes.
Clean the Circulation Pump and Inlet Valve
The circulation pump pressurizes and sprays water through the arms. The inlet valve controls water flow into the tub. If either is restricted by mineral buildup or debris, water flow drops and cleaning suffers. These are slightly more involved to access, but still DIY-friendly.
For the inlet valve: Turn off the water supply to your dishwasher (usually a valve under the sink). Disconnect the inlet hose from the back of the machine (have a towel ready, water may spill). Unscrew the fine mesh filter screen at the valve opening using pliers. Hold it under warm running water and brush away any sediment, sand, or mineral deposits with an old toothbrush. If heavily scaled, soak it in white vinegar for 30 minutes first. Reattach the screen, reconnect the hose, and turn the water back on.
For the circulation pump: Access requires removing the lower tub spray arm and filter assembly (covered in the first section). Underneath, you’ll find the pump housing. Look for any visible debris or blockage in the pump intake. If mineral buildup is visible, you can soak a rag in white vinegar, wedge it against the pump for 20 minutes, and let the vinegar dissolve scale. Rinse thoroughly with warm water.
For deeper circulation pump cleaning, some owners run an empty cycle with a rinse aid or descaling agent designed for dishwashers. Dishwasher maintenance techniques explain detailed descaling steps. If the pump makes grinding noises or doesn’t respond to cleaning, replacement by a technician may be needed, that’s a call-a-pro moment.
Run a Cleaning Cycle and Check Settings
Before assuming hardware failure, review your cycle selection. Bosch dishwashers offer multiple wash programs, normal, eco, intensive, quick, and others. If you’ve been running a quick or eco cycle on heavily soiled dishes, cleaning will be poor even if everything else works fine. Quick cycles use lower temperatures and shorter spray times: they’re meant for lightly soiled loads.
For regular, everyday dishes, use the normal or auto-sense cycle. For baked-on food, dried-on spills, or heavily soiled cookware, select intensive or pots-and-pans mode if your model offers it. Temperature also matters: hot water cleans better than warm water, especially with greasy dishes. Check that your water heater is set to at least 120°F (higher-end models may need 125°F to 130°F for best results). If your hot water is lukewarm, no dishwasher cycle will clean well.
Delay-start timers are convenient, but if the delay is too long, water temperature drops before the cycle begins, again reducing cleaning power. Avoid extreme delays.
Now, run a test cycle with dishes you’re willing to sacrifice if something goes wrong. Choose the normal or intensive cycle, ensure detergent and rinse aid are full, and let it run. Watch for spray arm movement through the glass window or door opening mid-cycle, if it rotates freely and water sprays forcefully, internal flow is good. After the cycle, inspect dishes for residue, spots, or cleanliness. If they come out spotless, congratulations, you’ve fixed it. If not, proceed to the final section.
When to Call a Professional
If you’ve worked through all five fixes and your Bosch dishwasher still isn’t cleaning properly, it’s time to bring in a technician. Deeper issues, a failed heating element, a worn circulation pump motor, a cracked spray arm, or faulty control board, require professional diagnosis and repair.
Other red flags to watch for: the spray arm doesn’t rotate even after clearing blockages, you hear grinding or squealing noises from inside the tub, water doesn’t fill the tub at all, or water leaks from the bottom door seal. These symptoms point to internal problems beyond typical maintenance.
Before calling, write down your model number (usually found on a sticker inside the door edge or on the back panel) and describe exactly what you’ve observed, poor cleaning, spots, residue, noise, leaks, etc. This helps the technician come prepared with the right parts.
Repairs typically run $150 to $400 depending on the part replaced. A new wash pump costs more than a new spray arm. If your machine is over 10 years old and faces a major repair, compare the repair cost to the price of a new unit (modern dishwashers are more water and energy efficient, too). Sometimes replacement is the smarter choice. Kitchen appliance guides often feature honest evaluations of repair versus replacement decisions.